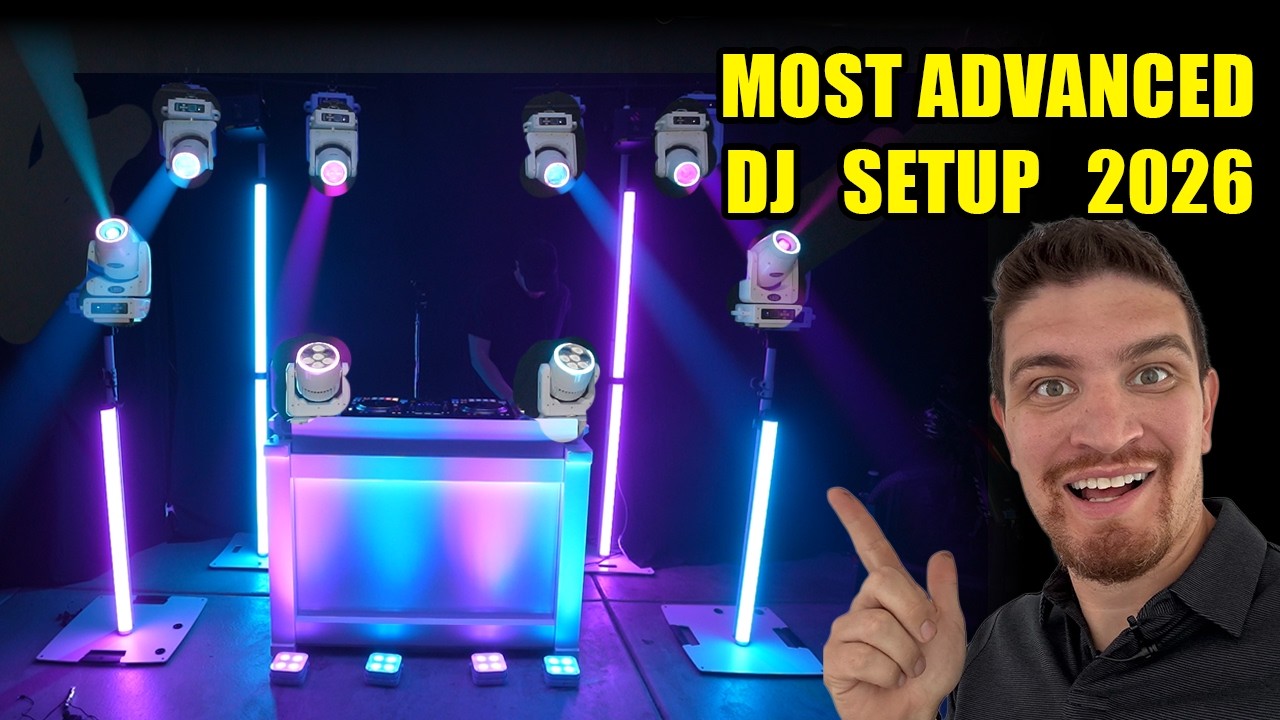
In 2026, DJ streaming is visual first. Audio quality will keep your listeners coming back, but video quality is what stops the scroll and gets someone to click play in the first place. A muddy, poorly lit camera angle tells viewers this is amateur hour before your first track even drops.
The good news: you don't need a TV studio budget to look great on camera. This guide breaks down the exact camera angles, lighting setups, and gear choices that take your DJ stream from bedroom to broadcast — whether you're working with €50 or €2,000.
A complete walkthrough of a professional DJ streaming setup in 2026 — camera, audio, and lighting included.
Why Video Quality Matters More Than Ever for DJs
The shift from audio-only to video for DJs isn't a trend — it's the new baseline. Listeners on Grooveline, Twitch, Mixcloud Live, and YouTube expect to see what they're hearing. A well-produced visual stream:
- Builds trust — a pro-looking stream signals you take your craft seriously
- Keeps viewers longer — eye contact and visual engagement increase average watch time by 40%
- Grows your brand — shareable clips and screenshots look better with good lighting and framing. For more on building a following, see our complete audience growth guide for streaming DJs.
- Differentiates you — most DJs stream with a single webcam and room lighting. Doing more sets you apart immediately
The Three Essential Camera Angles for DJ Streams
Before we talk gear, let's talk framing. These are the three camera angles every DJ should aim for, in priority order.
1. Front Face-On (The Main Angle)
This is your primary camera. Frame yourself from the chest up, with the DJ controller visible in the lower third. The camera should be at eye level or slightly above — shooting from below is unflattering for everyone. Position it 2-3 feet away on a desk mount or tripod.
2. Overhead (The Deck Shot)
An overhead shot of your mixer and decks is the second most important angle. Viewers want to see your hands moving — track selection, EQ tweaks, and effects manipulation are part of the performance. Mount your camera on a boom arm or ceiling mount directly above the controller.
3. Wide / Room (The Atmosphere Shot)
A wider shot that shows your full setup — speakers, lighting, and the room vibe. This is the angle you cut to between transitions or during breakdowns to keep visual interest. A smartphone on a tripod works perfectly for this.
Three-Point Lighting: The Professional Standard
The single biggest visual upgrade you can make to your stream costs under €50. Three-point lighting is the industry standard for video production, and it works just as well for DJs as it does for news anchors.
Key Light (The Main Source)
This is your primary light, positioned at a 45-degree angle to your face, slightly above eye level. It creates the main illumination and establishes the mood. A simple LED panel or ring light works perfectly. The Elgato Key Light is the de facto standard, but a Neewer 660 LED panel at €40 delivers 90% of the quality.
Fill Light (The Shadow Killer)
Positioned on the opposite side of your face at a lower intensity (50-70% brightness), the fill light softens the shadows created by the key light. Without it, half your face is in shadow, which looks dramatic — but not in a good way for streaming.
Back Light (The Separator)
Placed behind you and aimed at your shoulders and head, this light creates a subtle rim that separates you from the background. This is what makes streamers look "three-dimensional" and professional. An RGB strip behind your monitor or a small spotlight works here.
Camera Options: What Actually Works for DJ Streaming
Here's where gear decisions get practical. Your camera choice depends on budget, space, and how serious you want to get.
Budget Tier (Under €100)
Modern smartphone + a €15 tripod mount. Your iPhone or Android camera already shoots 4K and has excellent auto-exposure. Use an app like EpocCam, DroidCam, or Camo to feed it into OBS Studio over USB. This single setup outclasses most €50 webcams.
Mid-Range (€100-€300)
Logitech Brio 4K or Razer Kiyo Pro. These are the workhorses of the streaming world. The Brio 4K handles low light well, has a wide 90-degree field of view, and delivers consistent 1080p60. The Kiyo Pro has a larger sensor for better low-light performance — ideal if your DJ space doesn't have studio lighting.
Pro Tier (€500+)
DSLR or mirrorless camera with HDMI capture card. A Sony ZV-E10 or Canon EOS M50 paired with an Elgato Cam Link 4K gives you true DSLR depth of field and superior low-light performance. This is the setup used by professional esports streamers and full-time DJ broadcasters. Budget an extra €50-100 for a decent lens.
Lighting Gear: What to Buy by Budget
| Component | Budget | Mid-Range | Pro |
|---|---|---|---|
| Key Light | Ring light USB (€20) | Neewer 660 LED (€40) | Elgato Key Light (€170) |
| Fill Light | Desk lamp + white paper diffuser (€10) | Neewer SL-60 (€70) | Aputure Amaran 100d (€200) |
| Back Light | RGB LED strip (€15) | Govee RGBIC strip (€35) | Philips Hue Play bars (€70) |
| Total | €45 | €145 | €440 |
The budget setup — a USB ring light and an RGB strip — gets you 70% of the way to broadcast quality. The mid-range setup with proper LED panels gets you 90%. Only the pro tier with Elgato/Aputure gear is indistinguishable from a TV studio, and even then, the returns diminish fast.
Audio for Video Streams: The Overlooked Element
Here's something most camera-and-lighting guides skip: audio for video DJ streams is different from audio-only. When you add video, your microphone placement matters in ways it didn't before.
- USB condenser mic (€50-€150) — Shure MV7, Rode NT-USB, or Blue Yeti on a boom arm. Position it just out of frame, pointing at your mouth, with the pickup pattern set to cardioid to reject controller noise.
- Lavalier/clip-on mic (€20-€80) — the simplest solution for DJs. Clip it to your collar and it picks up your voice cleanly, rejecting the room. The Rode Wireless GO II or Hollyland Lark M2 are excellent options.
- Audio interface + XLR (€200+) — if you're already running a DJ mixer with a mic input, use it. Run your mic through the mixer's channel and send the master mix to your streaming computer. This keeps your voice perfectly in sync with the music.
"Your viewers will forgive mediocre video quality far more readily than they'll forgive bad audio. Invest in the microphone before the camera."
Background and Set Design
Your background says something about you to every new viewer within the first three seconds. It doesn't have to be a dedicated studio — but it does need to be intentional.
- Clean and minimal: A plain wall with a vinyl display or your logo works great. Empty space is better than clutter.
- Geek out: Show your gear rack, synthesizers, or record collection. This builds credibility with fellow DJs.
- Lighting accent: RGB strip lights behind your monitor or desk create depth. Brand colors (teal, coral, amber) add personality without distraction.
- Green screen: Only if you can light it properly. A poorly lit green screen looks worse than no green screen. If you go this route, budget for two extra lights just for the screen.
Integrating with OBS Studio
OBS Studio is the glue that ties everything together. Your camera feeds, lighting, and audio all converge here. For a full deep dive on OBS scenes, hotkeys, and streaming presets optimized for DJs, check out our complete OBS Studio for DJs guide — this covers the advanced scene composition and settings side.
For the camera-and-lighting setup specifically, here are the OBS settings that matter:
- Video resolution: 1920x1080 at 30 fps minimum. 60 fps costs more bandwidth but looks smoother for fast hand movements on decks.
- Bitrate: 4,500-6,000 kbps for 1080p. Higher if your upload bandwidth allows.
- Color correction — OBS has built-in filters. Add a LUT (look-up table) to your camera source for consistent color across all angles. Free DJ streaming LUTs are available from the OBS community.
- Noise suppression: Enable the built-in RNNoise filter on your microphone source to remove background hum and controller clicks.
If you're using a capture card with a DSLR, you'll also want to adjust your camera's exposure settings directly. Set shutter speed to 1/60 for 30fps or 1/120 for 60fps, aperture between f/4-f/5.6 for depth of field, and ISO as low as possible while keeping exposure. Manual white balance is critical — set it to 3200K-4000K for warm, club-appropriate tones, or 4500K-5500K for neutral daylight.
Putting It Together: A Practical Workflow
- Frame your main camera at eye level, chest-up shot, DJ gear visible in the lower third
- Set up your key light at 45 degrees to your face, slightly above eye level. Dial in brightness until your face is evenly lit
- Add your back light — RGB strip behind your monitor or a small spotlight behind you
- Check exposure in OBS — use the waveform monitor to ensure your face sits between 70-90% brightness with no clipping
- White balance your camera to match your lighting temperature (most ring lights default to 5500K daylight)
- Set up a second angle — overhead or wide — and create a scene switch hotkey in OBS
- Test with a recording — record 2 minutes of yourself mixing and playing air to camera. Review for shadows, audio sync, and visual interest
- Go live on Grooveline or your platform of choice. Introduce yourself, explain your setup, engage with chat — the camera presence will come with practice
A thorough walkthrough of building a professional 4K streaming setup — from camera and lighting to OBS configuration.
FAQ
Do I need an expensive camera to look good on stream?
No. A modern smartphone with good lighting will look better than an expensive DSLR with bad lighting. Invest in lighting first, then upgrade the camera. The difference between a €20 ring light and no ring light is more visible than the difference between a Logitech webcam and a Sony mirrorless.
What's the fastest visual upgrade I can make?
Add a back light. A €15 RGB LED strip behind your monitor creates depth instantly. It separates you from the background and makes the whole frame look three-dimensional, even if your main lighting is basic.
Can I use the same camera for the overhead and face angles?
Yes — use your smartphone as a dedicated second camera. Most 2025+ smartphones shoot 4K video that rivals dedicated webcams. Apps like EpocCam, DroidCam, or Camera for OBS Studio feed the phone feed directly into OBS over Wi-Fi or USB.
How do I stop my microphone from picking up the DJ controller?
Three fixes: (1) Use a dynamic microphone (Shure MV7, SM58) instead of a condenser. Dynamics reject off-axis sound naturally. (2) Position the microphone closer to your mouth and lower its gain. (3) Apply OBS's built-in noise gate and RNNoise suppression filters to cut anything below your speaking volume.
Sources & Further Reading
- OBS Studio Documentation — official guide to scene setup, filters, hotkeys, and streaming configuration
- Digital DJ Tips — The Ultimate Guide to DJ Livestreaming — comprehensive resource covering gear, software, and best practices for DJ broadcasters
- iZotope Recording 101 — Microphone Techniques — professional guide to microphone placement and pickup patterns for vocal recording
- DSLR Video Shooter — 4K Streaming Setup Guide — practical camera settings for live streaming with DSLR/mirrorless cameras
- Rtings — How to Choose Lighting for Video — technical breakdown of CRI, color temperature, and brightness for video lighting
Ready to put your new camera and lighting setup to work? Grooveline is a free platform for DJs to broadcast — create your profile, book a slot, and stream to an audience that values great production.